
Building Tabisuru Makers Lab!
Hello, everyone who has been supporting Tabisuru Makers Lab. This is Hiro Namekawa.
It's been one week since I launched the crowdfunding campaign. So many of you have supported me that I've already passed 70% of my goal. Thank you so much! I'd be grateful for your continued support and shares!
In this update, I'd like to show you how the main body of Tabisuru Makers Lab is being designed and built.
Designing Tabisuru Makers Lab
The design began around March 2026. I looked at examples of mobile houses built on kei truck beds on YouTube and elsewhere, and decided on the size and structure. The kei truck that will travel around Japan for this project is a used Honda Acty. The bed of most kei trucks, the Acty included, is roughly 1.9 m long and 1.4 m wide. By law, you can load 350 kg on the bed, and you're allowed to extend a set distance to the sides and rear. I'm designing within these dimensions and the law.
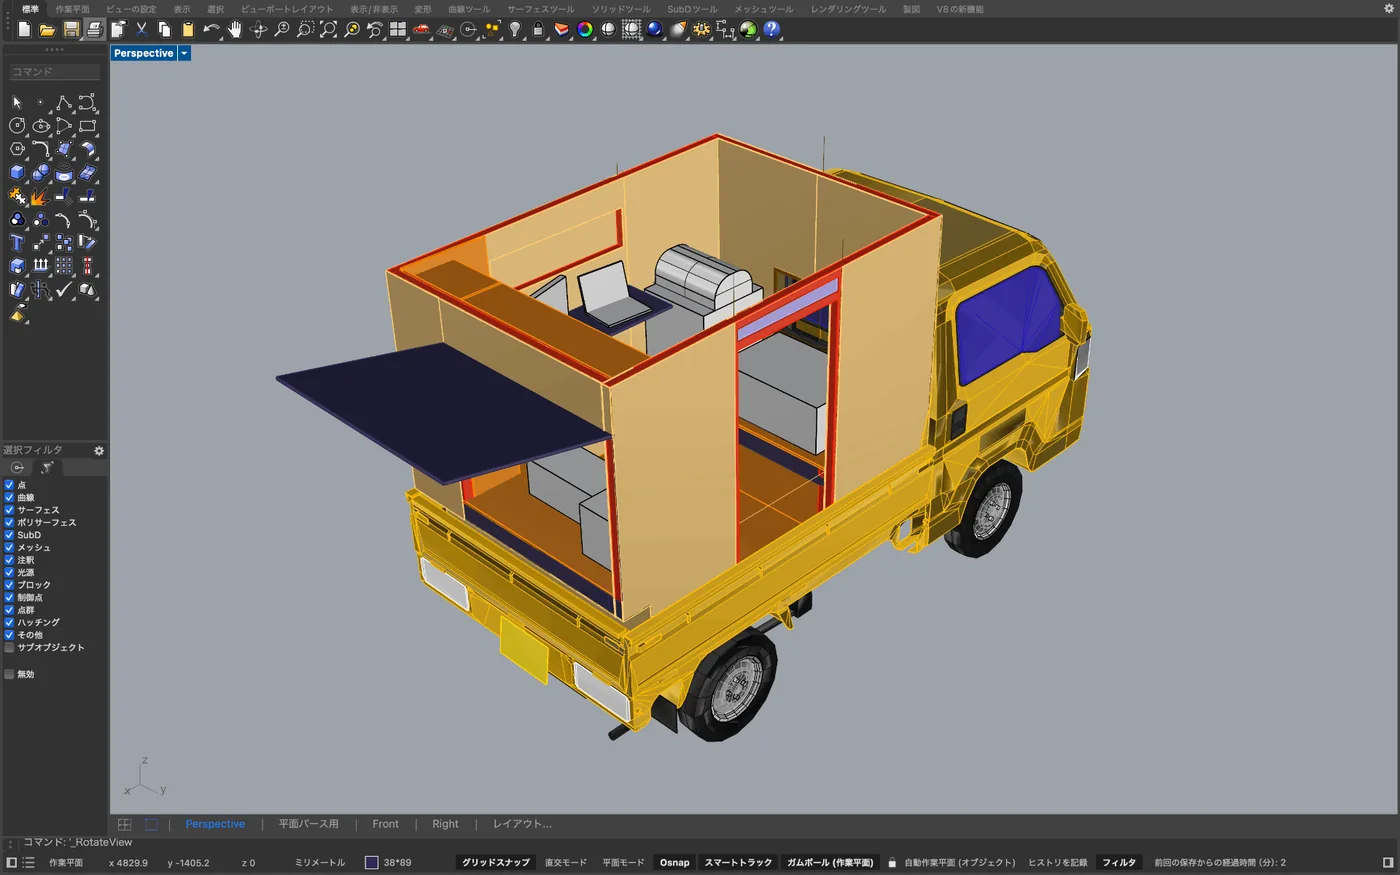
I'm using a CAD program called Rhinoceros for the design. I've studied architecture since my first year of undergrad, but this is the first time I've actually designed and built a house myself (though a tiny one, under two tatami mats), so I'm thrilled. I designed the height of the desks and ceiling to fit the equipment I'll be putting in and my own height.
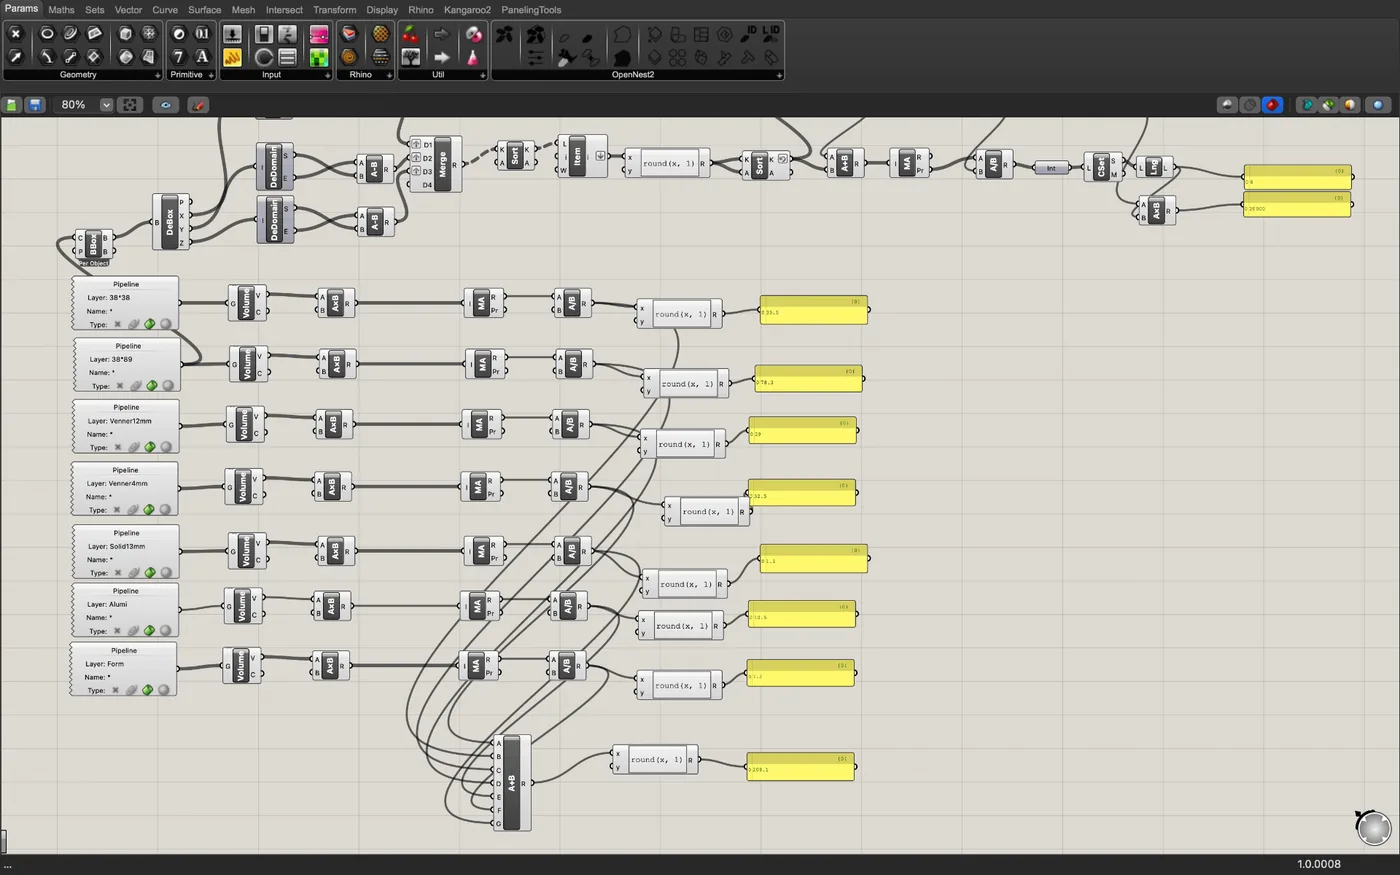
Rhinoceros has a plug-in called Grasshopper. It lets you assemble code (blocks), much like programming, to create forms, run structural calculations, and lots more. A kei truck can only carry 350 kg, so weight is extremely tight. From the volume and density of each material I need, I estimate the workshop's approximate weight with Grasshopper. Make it too light and it's weak; too strong and it's heavy. It's a tough balance, but I settled on a target of about 190 kg.
Painting the Truck
If I'm going to travel around Japan, I want a truck in a cute color! So I decided to paint it myself. I'm painting it a slightly reddish yellow (yamabuki-iro), which is my favorite color and also the theme color of Tabisuru Makers Lab.
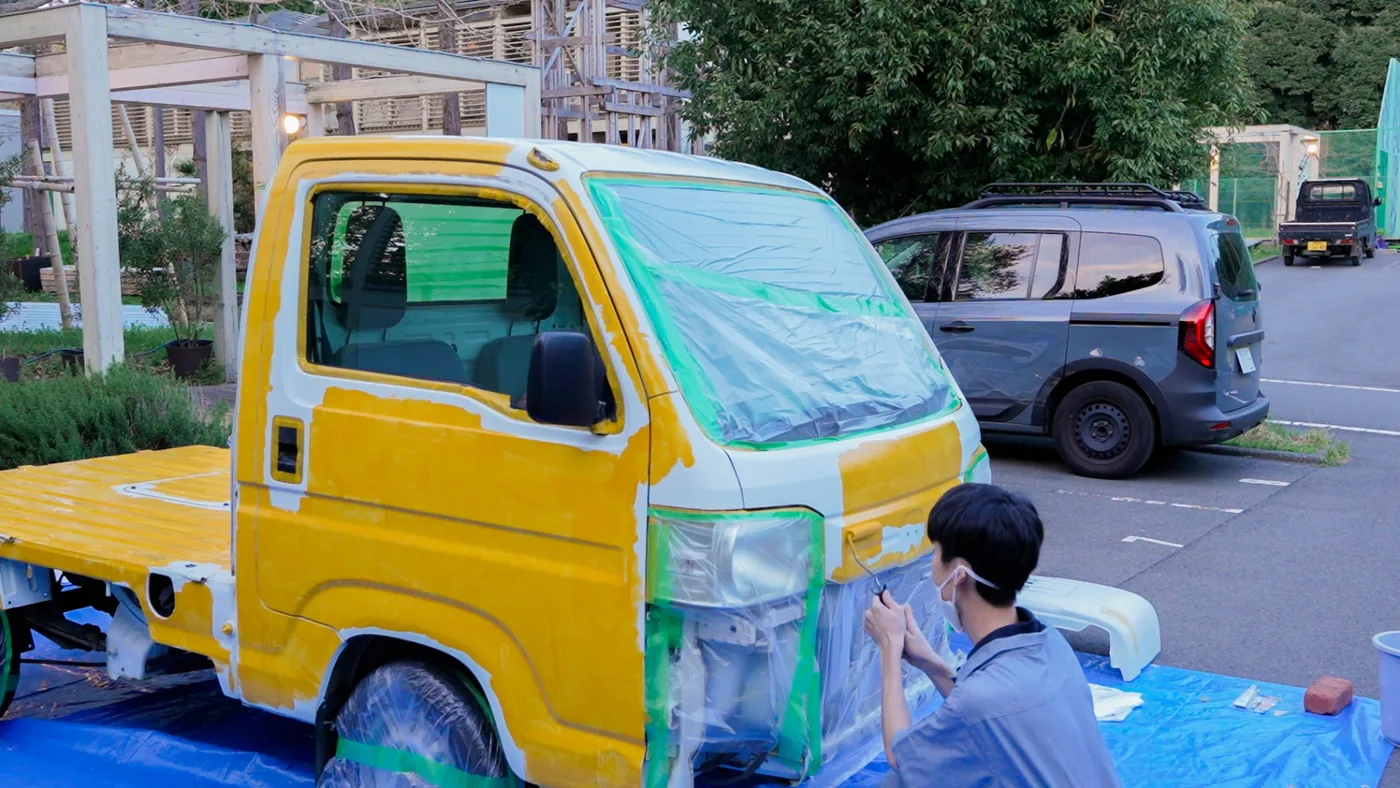
Painting a car has five steps.
1. Washing — remove dirt from the car
2. Sanding — rough up the body with fine sandpaper, around #400
3. Degreasing — remove oil and sanding dust
4. Masking — protect the parts you don't want paint on
5. Painting — apply paint with a roller
It sounds difficult, but once you get started it's fun. If anyone out there wants to paint their own car (lol), please call me. I'd be happy to help.
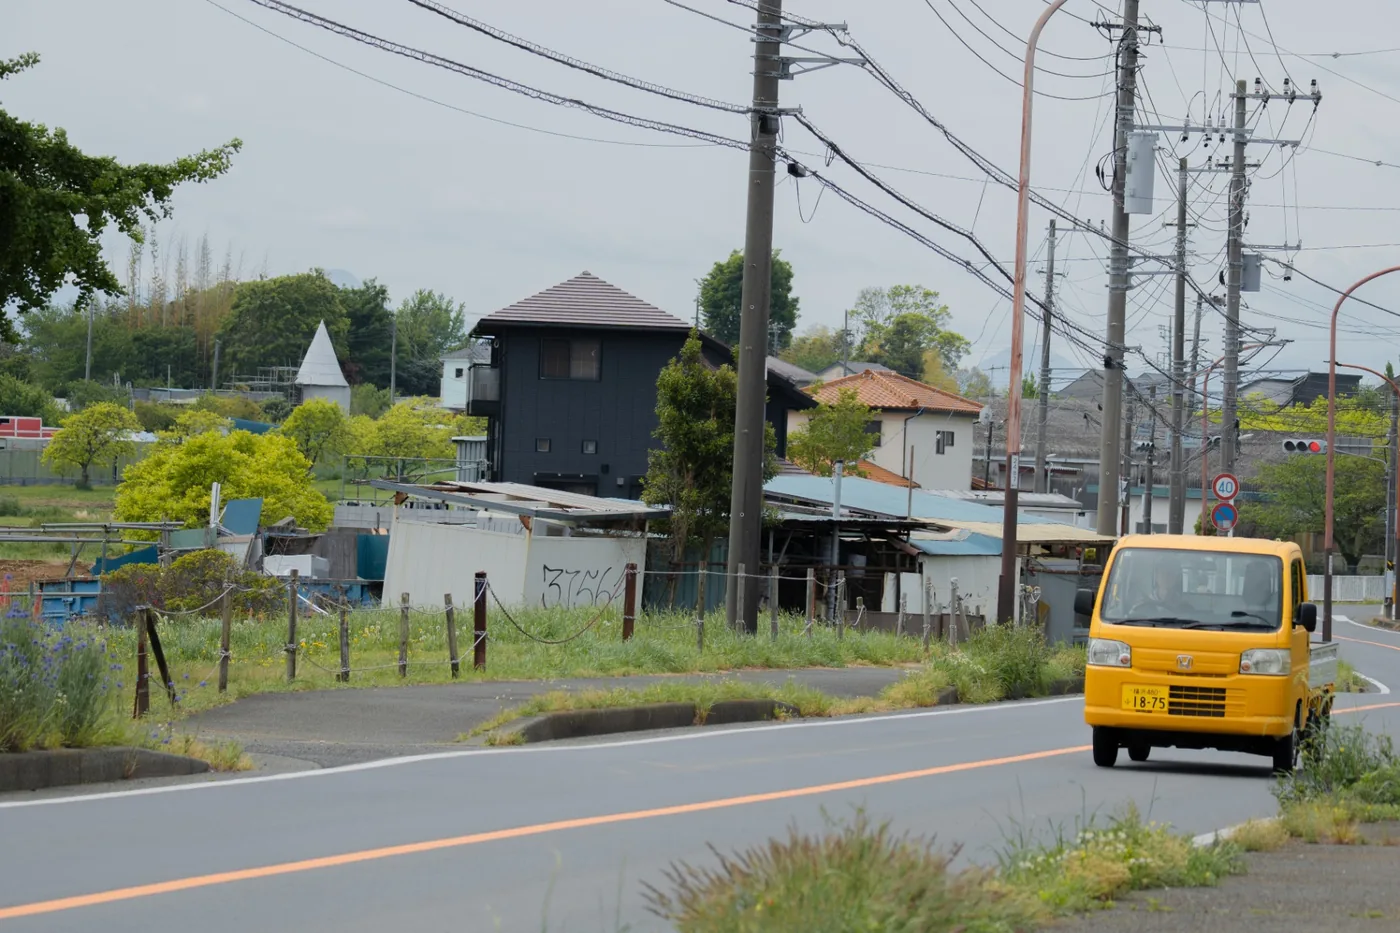
When it drives through town, it stands out because it's yellow. It's a cute color, so I hope it helps people feel friendly toward me.
Building the Frame
Now I finally start building the main body of the workshop.
For mobile houses on kei trucks, there are broadly two ways to build the structure: an aluminum frame or a wooden one. Aluminum is lightweight but expensive, needs connectors to join, and isn't very flexible. Wood is somewhat heavier but cheaper, and since it's fixed with screws, it's relatively flexible. I wanted to freely build desks and shelves inside, so I chose wood.
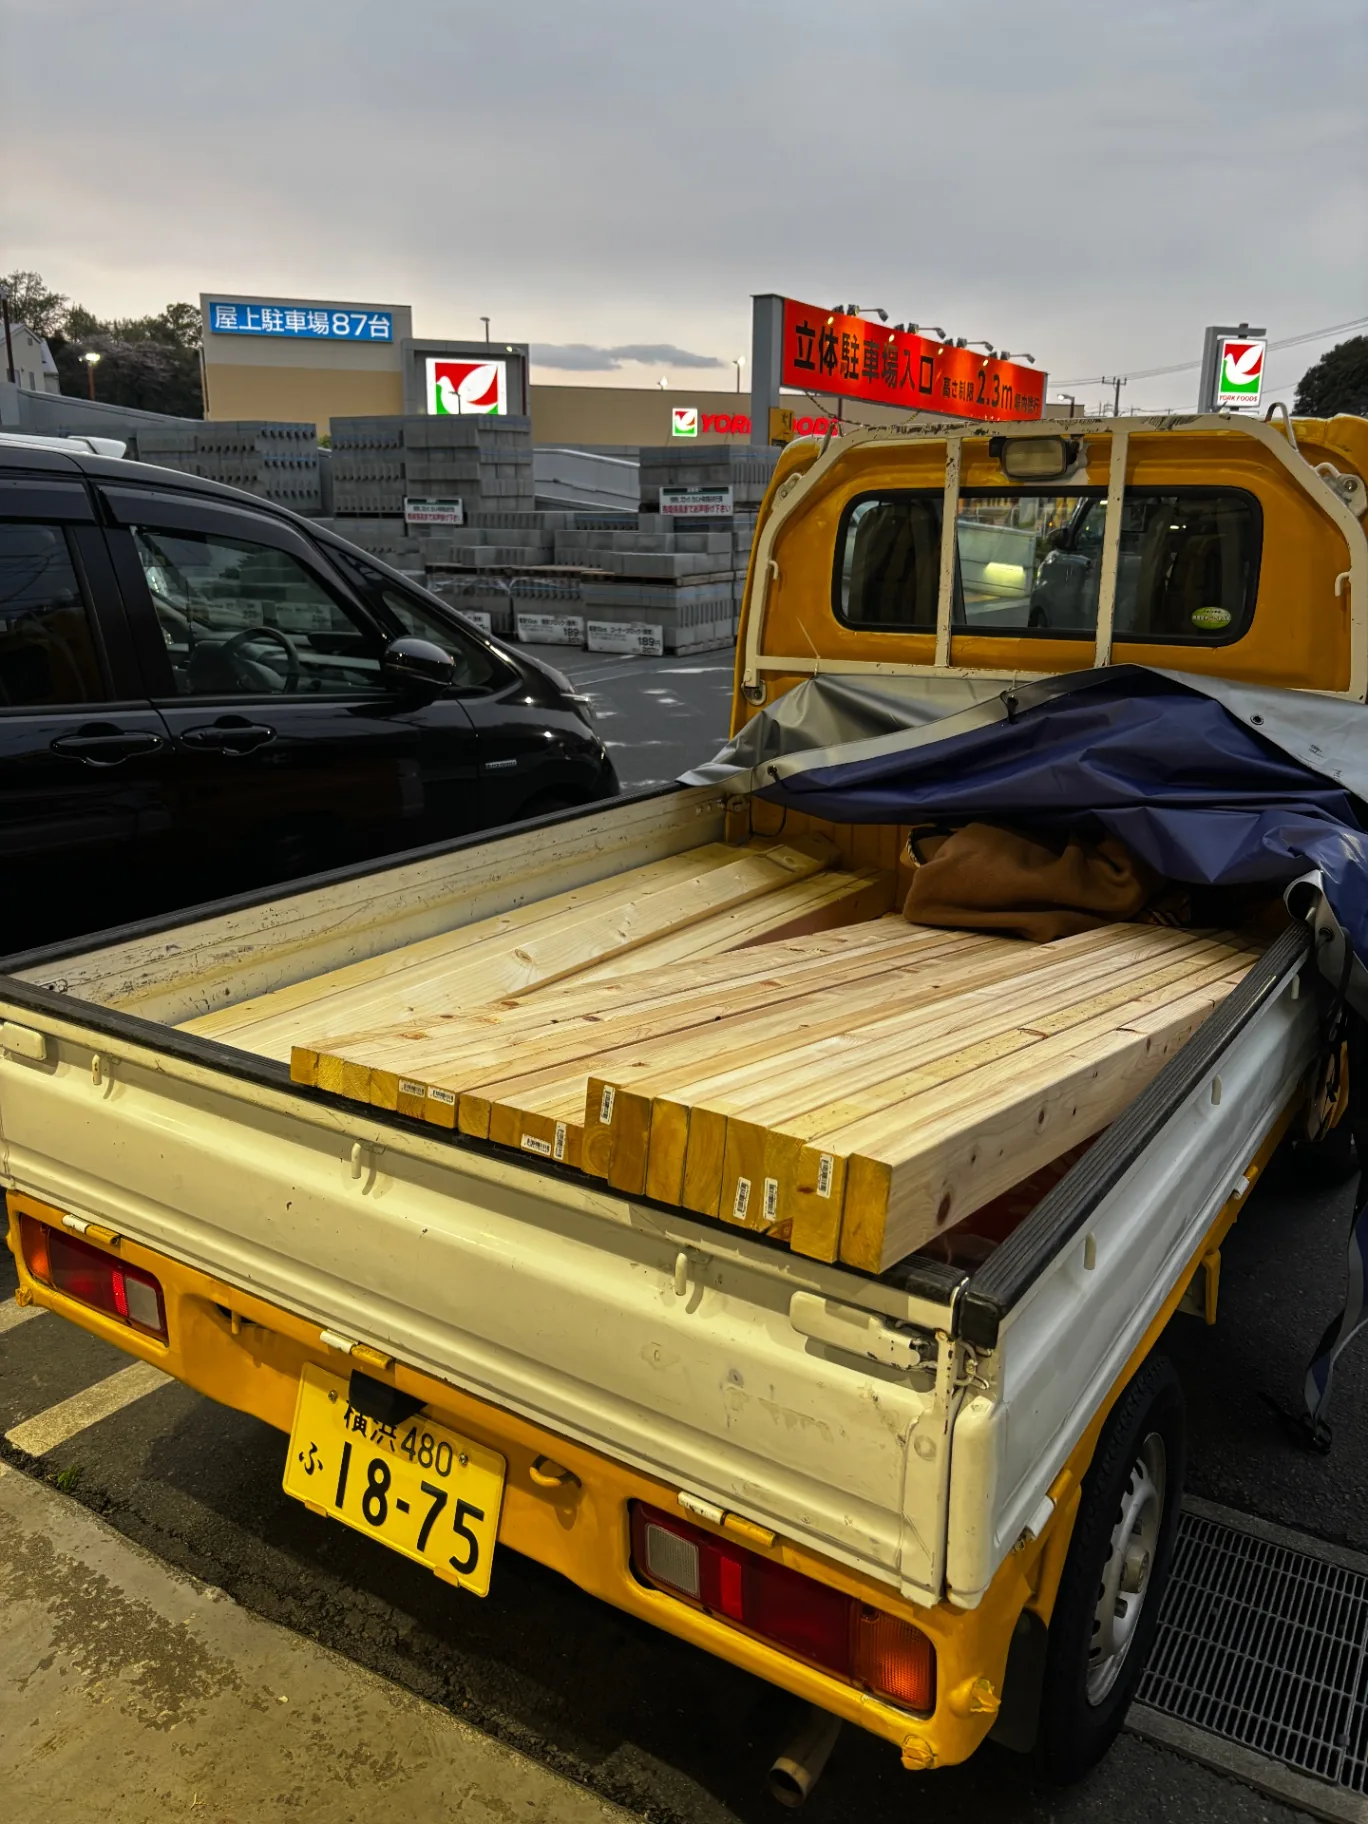
I calculated the number of parts I needed with the Grasshopper I mentioned earlier. It's quite a lot! (On top of what's in this photo, I also bought plywood for the walls and floor and Styrofoam for insulation. Whenever something ran short during construction, I went back to the hardware store — I've lost count of how many times, lol.)
It took about two weeks to finish the frame. Since I cut the wood with a circular saw and a chisel, it was harder than I expected. Once the frame is up, you can begin to see the space of Tabisuru Makers Lab, which makes me really happy.
Key Points of Building a House: Insulation, Airtightness, and Waterproofing
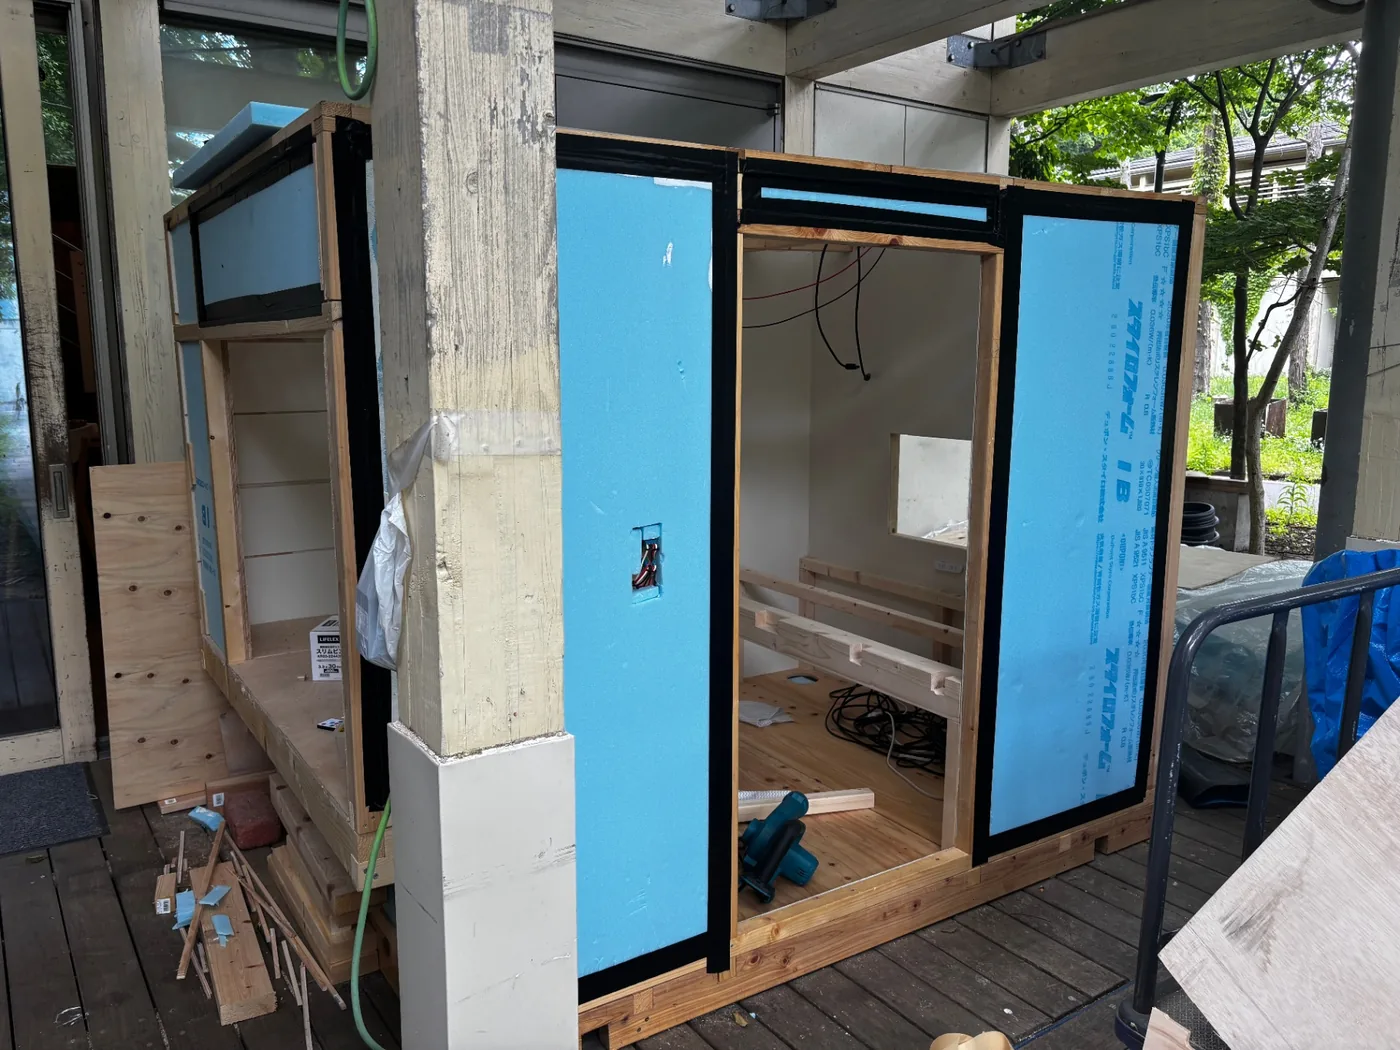
What most determines how comfortable a house is, is probably “insulation.” A kei truck that's always under the sun is expected to get hot — not only the cab but also the inside of the workshop. Of course I plan to install a small spot cooler for summer, but insulation is still essential. So I'm putting a type of insulation used in houses, Styrofoam, inside the walls. Because of recent circumstances, Styrofoam is also in short supply. I was lucky to buy what I needed just before it got scarce, but building houses from now on will be hard for the whole construction industry...
There are two more important points in building a house: “airtightness” and “waterproofing.” Airtightness means preventing air from leaking. Of course, in a completely sealed space, breath and moisture cause dampness, mold, and bad air, so ventilation is important. But if there are gaps in the walls, cold air leaks in and out, and the effect of the insulation is weakened. That's where waterproof airtight tape comes in. By neatly taping this black tape around the Styrofoam between the studs, you can achieve a solid seal.
I haven't done it yet, but on top of this I'll put a waterproof, breathable membrane. With it, even if rainwater gets in from the roof or outer walls, it can be kept from getting inside.
These steps are nearly the same as in real house building. I'd seen them in classes and materials, but this is the first time I've actually used them. I hope it becomes a comfortable space!
Building Walls with ShopBot, a Machine That Cuts Wood Freely
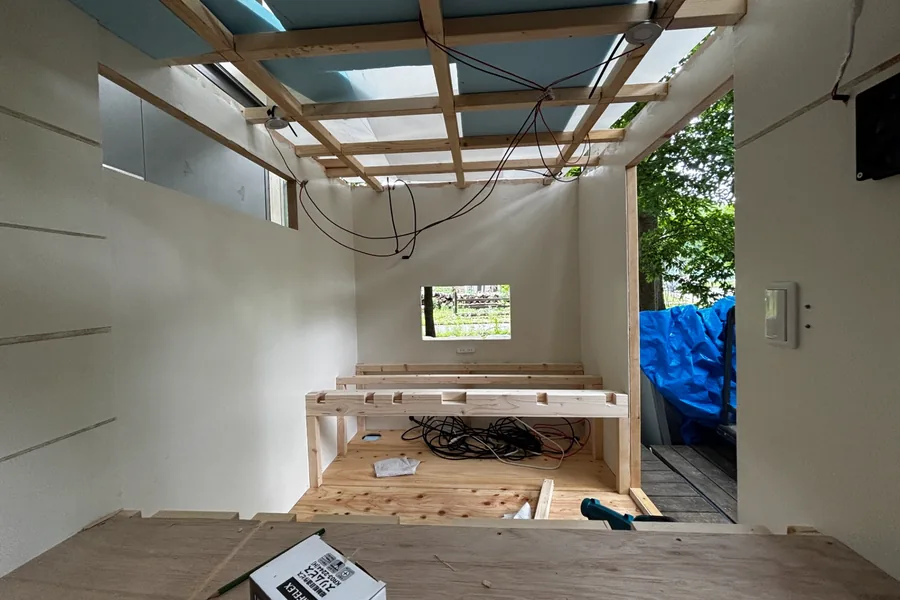
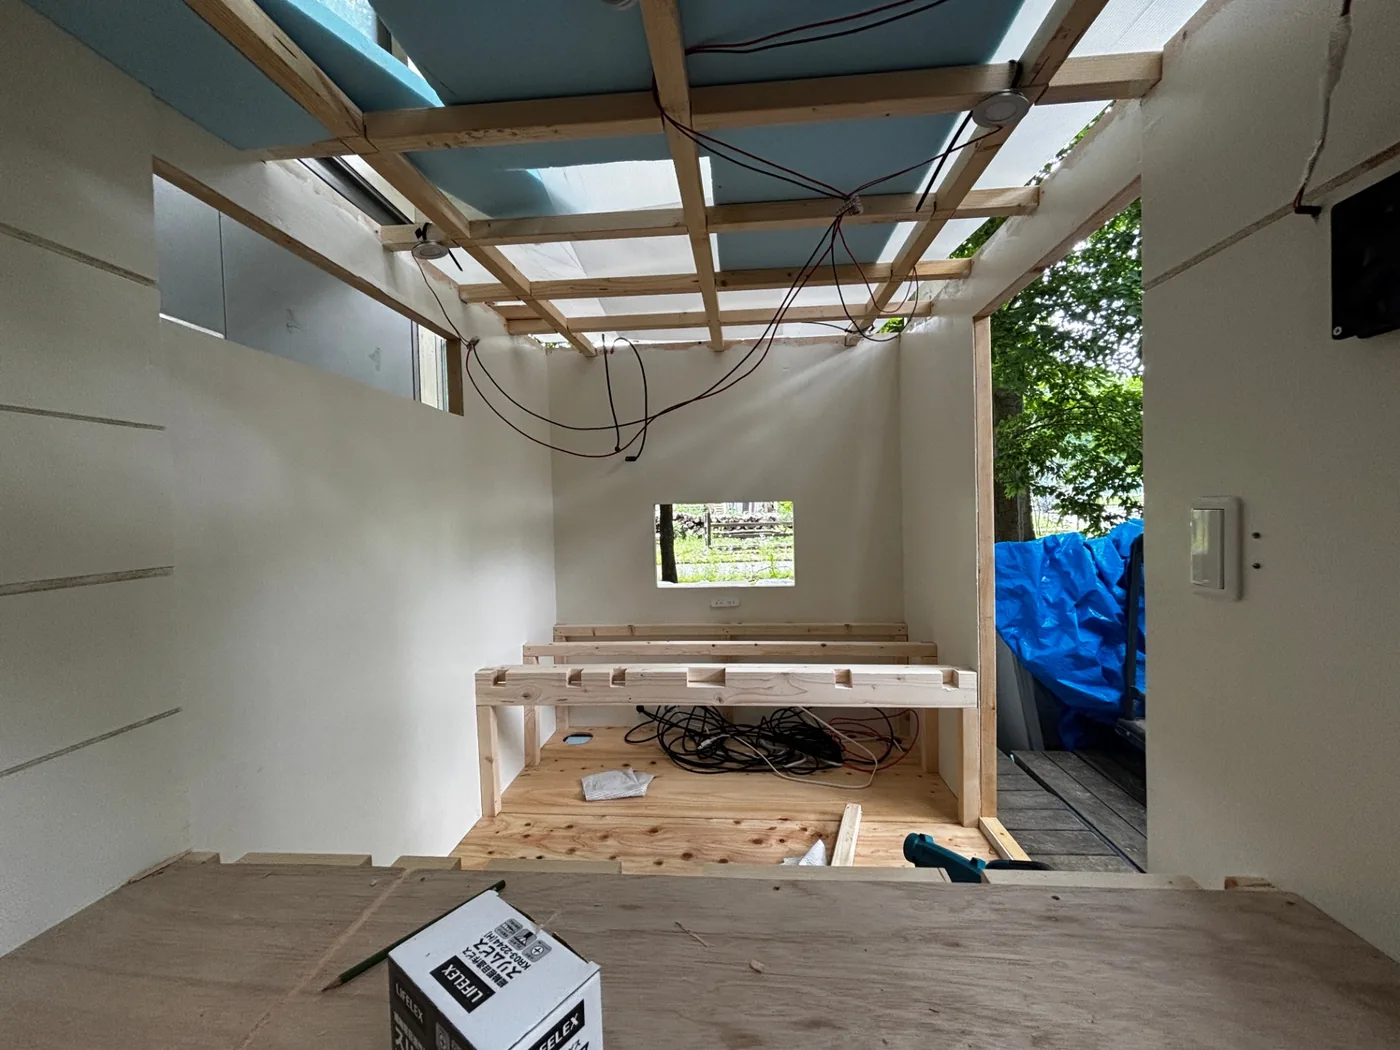
Work on the interior of Tabisuru Makers Lab is also moving along. At Keio University's Shonan Fujisawa Campus (SFC), where I study, there's a very handy machine called a ShopBot that cuts plywood freely. This time too, I cut the walls with this machine exactly as designed in CAD. Once the walls are cut and attached, it suddenly starts to feel like a room. I decided to paint the walls white. According to research by a certain housing manufacturer, people feel most at ease when 30% of what they see is wood. So I left the wood grain of the plywood only on the floor and ceiling, and painted the walls.
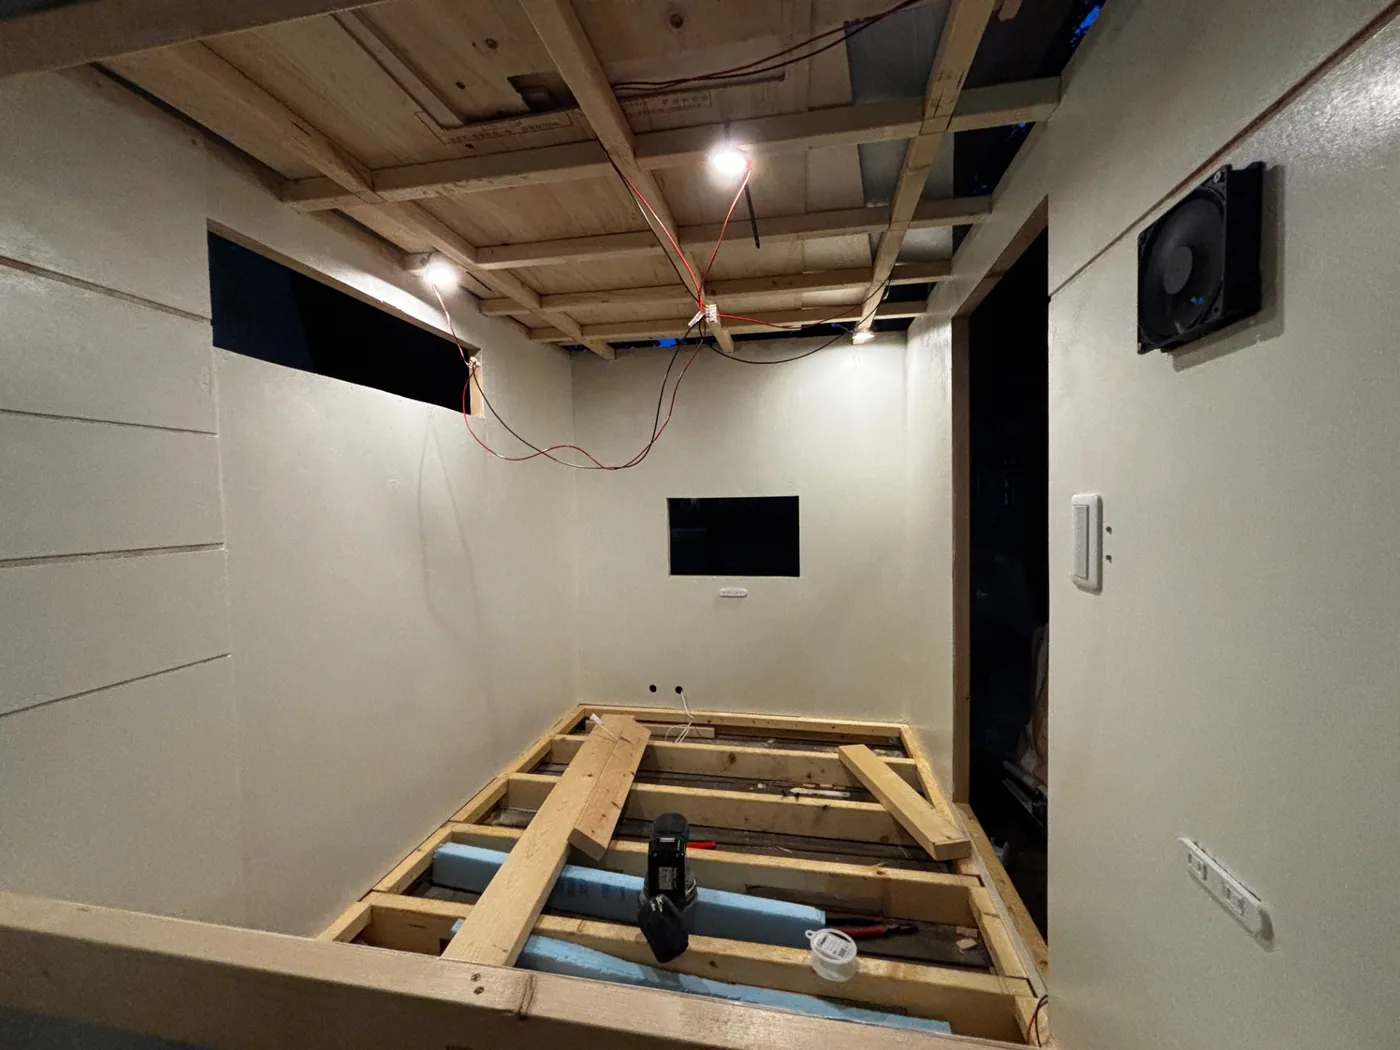
This workshop is a workshop, but also my living space. I thought hard about how to arrange the equipment and tools while also making it possible to live here, and about the size and placement of the shelves and desks. (There's a lot you can't know without actually building and using it, so it's a bit nerve-wracking...) The front and back of the workshop are large fixed desks, and the floor is left in the middle. When it's time to sleep, I plan to lay boards over the middle part too and sleep on top of the desks. If I can make storage under the floor, I could move things there when I sleep, which would be more comfortable.
Off-Grid Electrical System
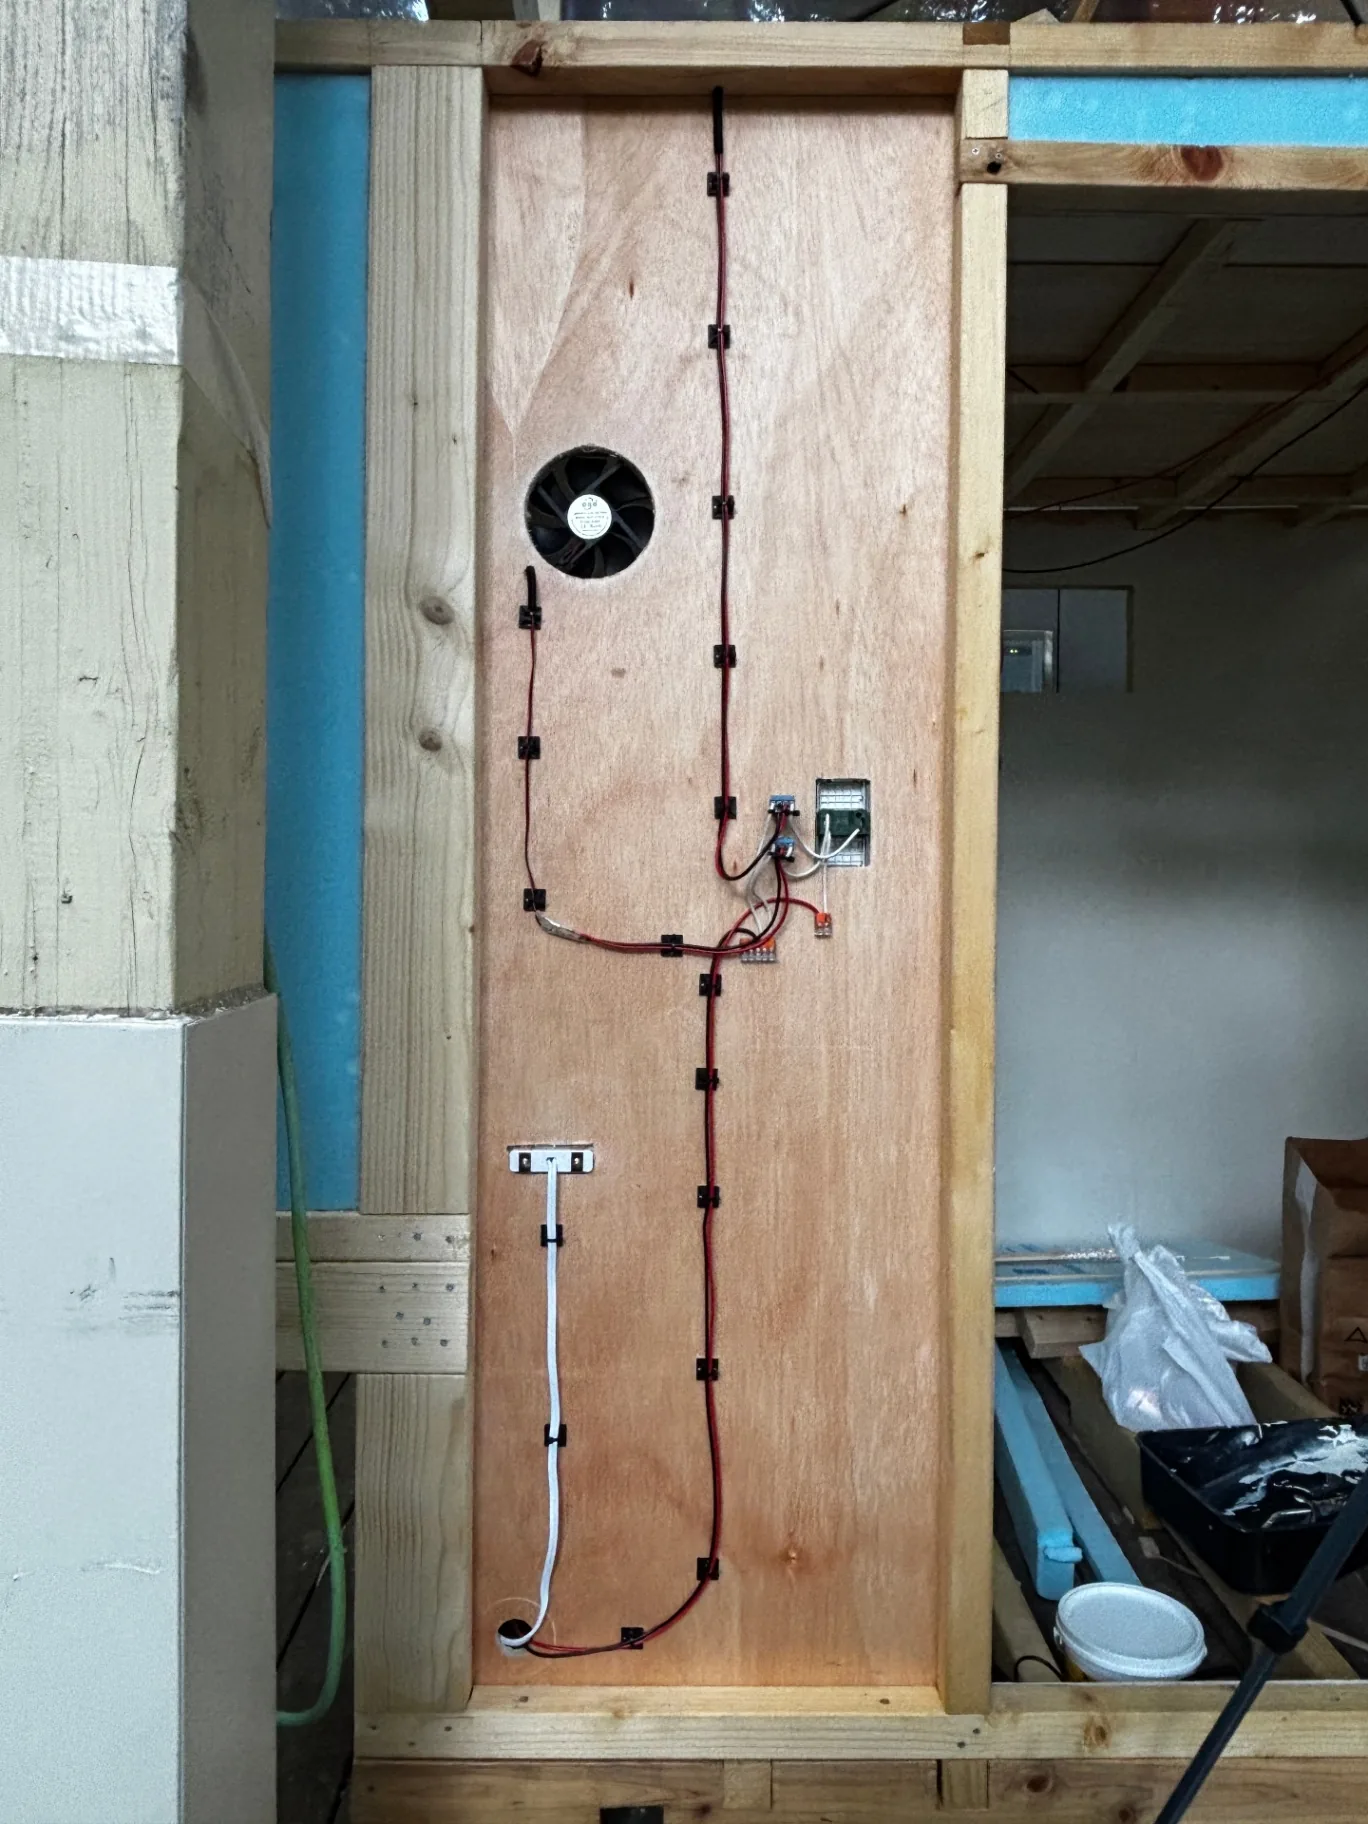
Tabisuru Makers Lab aims to be independent of local infrastructure for electricity too. So I generate electricity with solar panels and driving charging (a car runs its engine to drive a generator to make electricity, and I borrow a little of that from the car), and store it in a battery inside the workshop. I haven't installed the solar panels and batteries yet, but the wiring inside the workshop is steadily progressing.
Look Forward to the Finished Workshop!
What's left is putting on the waterproof sheet and outer walls, the ceiling, and installing the electrical equipment such as solar panels. Completion is getting really close!
Once it's finished, I'd love to hold an unveiling event somewhere. Please look forward to its completion and to Tabisuru Makers Lab's journey afterward. Thank you for your continued support.
I also share the making process on various social media, so please take a look!
https://www.youtube.com/@tabisuru_lab
https://x.com/tabisuru_lab
https://www.instagram.com/tabisuru_lab/

Share or save this article